Hello Quilting Enthusiasts! This is Gina, your go-to quilting artist, and today, we’re going to unravel the mystery of quilt basting!
Basting Basics: Dive into the World of Quilt Preparation!
Three core methods dominate the world of quilt basting:
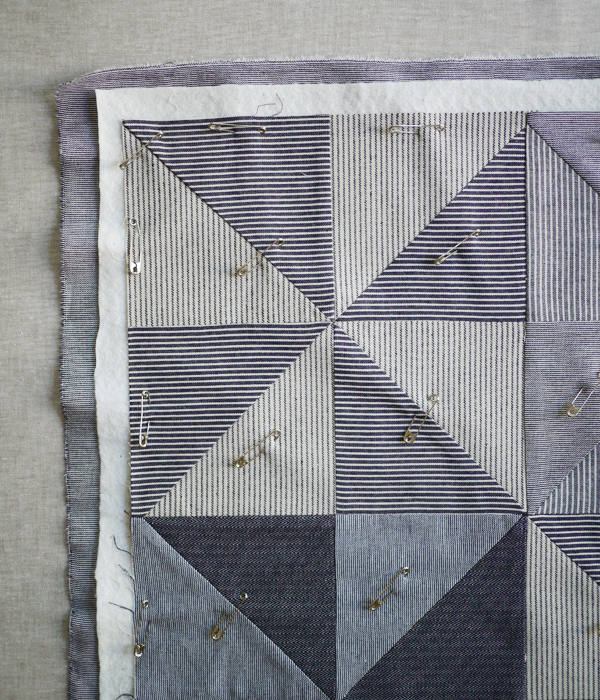
1. Safety Pin Basting: Simply put, you’ll use safety pins to keep your quilt pieces snug and together. Ideal for those seeking precision without a fuss.
2. Thread Basting: A favorite among hand quilters, this method employs long running stitches to keep everything in place.
3. Spray Basting: Speedy and slick, a temporary adhesive spray is your best buddy in this method.
Your style, materials, and unique preference will influence your basting choice. Let’s dive a little deeper!
Getting the Lay of the Land: The Quilt Sandwich!
Alright, the ‘Quilt Sandwich’ might not satisfy your lunch cravings, but it sure is a treat for quilters!
1. Quilt Top: This is your masterpiece of design, colors, patterns, and all things fabulous.
2. Batting/Wadding: The heart of the quilt, providing warmth and that signature quilted feel.
3. Quilt Backing: This solid fabric beauty lies at the bottom, making or breaking your quilt’s overall look.
Lay down these layers, starting with the backing (wrong side up), followed by batting, and then the quilt top (right side up). Ensure it’s wrinkle-free, and you’re set for basting!
Pin Basting Extravaganza :
Popular among many, pin basting is quite straightforward. Just remember:
– Stretch out your quilt sandwich.
– Use quilting safety pins, starting from the center.
– Aim for about 4-inch gaps between pins.
– Safety first! Make sure to close those pins.
Tips for Pin Basting:
– Ensure a spacious surface.
– Be generous with pins.
– Opt for the Kwik Klip tool for speed.
– Start from the center.
– And yes, remove pins while sewing!
Spray Basting Magic ✨:
For those on the fast track, spray basting is the answer.
1. Prep your quilt layers.
2. Spray a light layer of adhesive on the quilt back, then on the batting.
3. Add your quilt top.
4. Press gently and let it dry a tad before quilting.
Spraying Wisely: Always read the manufacturer’s guidelines. Work in a well-aired space and wear a mask. And remember, test before you go all out!
Classic Thread Basting :
The OG of basting methods, thread basting is all about long, loose stitches. Ideal for larger quilts and those avoiding chemicals.
Steps:
1. Lay out your quilt elements.
2. Pin the layers at the edges.
3. Use a long needle and thread, making stitches about 4 inches apart.
4. Once done, ditch the safety pins, and you’re ready to quilt!
Always remember, thread basting is temporary, so perfection isn’t key. Enjoy the process!
Key Takeaways:
| Method | Key Point |
| Safety Pin Basting | Easy and precise with safety pins. |
| Thread Basting | Long, loose stitches, great for larger quilts. |
| Spray Basting | Fast and efficient, but remember to test first! |
Wishing you all a fantastic quilting experience! Until next time! – Gina

