Quilting is an enjoyable and rewarding hobby that is also a great way to teach children important skills such as patience, perseverance and problem solving. It is also a craft that can be done by children of all ages and skill levels, so it is a great way to introduce them to the world of sewing and needlework. In this guide, you will learn how to teach children to quilt, from selecting the appropriate materials and equipment to guiding them through the basics of quilting and creating their own quilt patterns.
What You Will Need
The first step in teaching children to quilt is to gather the necessary supplies. You will need fabric, batting, scissors, pins, needles, thread, a thimble and a quilting hoop. You will also need a quilting ruler or template, a cutting mat and a rotary cutter. Additionally, you will need an iron, ironing board and a sewing machine.
Selecting Fabric
When selecting fabric for quilting, it is important to choose fabrics that are age-appropriate and easy to work with. For children, choose fabrics with bright colors and interesting patterns. Avoid small prints and intricate designs, as these can be difficult for young children to work with. You can also purchase pre-cut fabric bundles, which include all the fabric you need for a project.
Understanding the Basics
Once you have the supplies, it is important to teach children the basics of quilting. Start by showing them how to cut and measure fabric. Explain the importance of accurate measurements and how to use the quilting ruler and rotary cutter. Next, demonstrate how to pin the fabric together, and then show them how to sew the pieces together using a sewing machine.
Creating a Quilt Pattern
Once you have taught the basics, you can move on to creating a quilt pattern. There are many quilt patterns that are suitable for children, such as log cabin, nine patch, or patchwork. You can also find quilt patterns online or in quilting books. Once you have selected a pattern, show the children how to lay out the fabric and use the quilting template to cut the pieces.
Quilting the Pieces
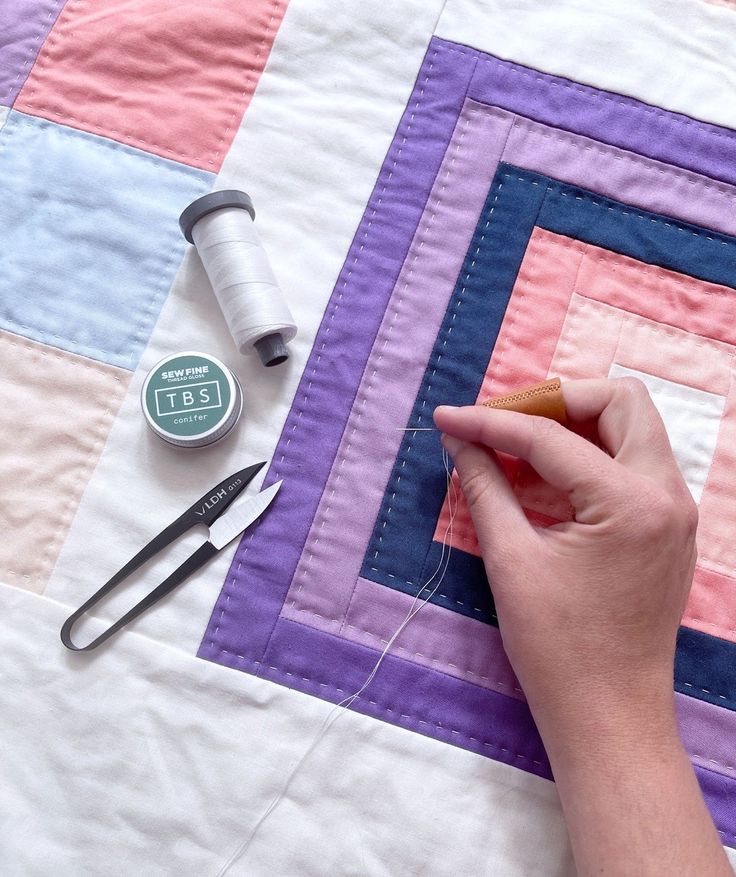
Once the pieces are cut, it is time to start quilting. Show the children how to pin the pieces together, and then demonstrate how to sew the pieces together using a sewing machine. If the children are too young to use the sewing machine, you can hand-sew the pieces together. Once the quilt top is complete, show them how to layer the quilt top with batting and backing fabric, and pin it together.
Finishing the Quilt
Once the quilt is assembled, show the children how to machine quilt or hand quilt the layers together. Explain the importance of evenly spaced stitches and how to tie off the ends. Finally, show the children how to bind the quilt and finish it off with a label.
Conclusion
Teaching children to quilt can be a fun and rewarding experience. With patience and guidance, children can learn the basics of quilting and create their own quilt patterns. By following this guide, you can successfully teach children to quilt and introduce them to the world of sewing and needlework.
1. Start with a simple project such as a bag, pillow, or quilt block.
2. Teach them the basics of cutting fabric and threading a machine.
3. Give them a few practice pieces of fabric to practice on before moving onto the main project.
4. Show them how to mark and cut out the fabric pieces they will need.
5. Teach them how to use the machine to sew the pieces together.
6. Explain the importance of pressing seams and why it is important for the project to lay flat.
7. Show them how to use quilting tools such as a rotary cutter, ruler, and mat.
8. Demonstrate the different quilting stitches and how to use them to hold the quilt’s layers together.
9. Explain how to bind the edges of the quilt to give it a finished look.
10. Encourage your child to be creative and make their own designs for the quilt.
Teaching Kids to Sew: A Guide to Starting Age and Techniques
Teaching Kids to Sew: A Guide to Starting Age and Techniques is a book that focuses on introducing the basics of hand sewing to children. It provides clear, step-by-step instructions on how to teach a variety of hand sewing techniques, as well as offering helpful tips on when and how to start teaching kids. The book also includes a range of age-appropriate projects and patterns, making it easy to tailor the projects to suit the individual child’s interests and skill level.
The book is written by author Gail Yellen, who has been teaching sewing to children since 1998. She is an experienced sewing teacher and has written several books on the subject, including “The Sewing Book for Kids”, “The Sewing Bible”, and “The Sewing Companion”.
The book is divided into three sections. The first section covers basic hand sewing techniques and how to start teaching children. It includes information on the types of fabrics and tools to use, as well as safety tips for teaching kids about hand sewing.
The second section includes a range of age-appropriate projects, such as clothing, home decor, and accessories. Each project includes instructions on how to complete the project, as well as helpful tips on how to tailor the project to the child’s skill level.
The third section includes patterns for all the projects in the book, as well as instructions on how to adjust the patterns for different sizes and fabrics.
Teaching Kids to Sew: A Guide to Starting Age and Techniques is suitable for any parent or teacher looking to introduce the basics of hand sewing to children. It is full of helpful information and advice, making it easy to customize the projects to suit the individual child’s needs.
How to Teach Sewing to a 5 Year Old – Tips for Parents
1. Start with simple projects: When teaching sewing to a 5-year-old, it is important to start with simple projects that do not require a lot of time or concentration. Sewing cards, felt shapes, and simple stuffed animals are great introductory projects.
2. Make it fun: Make sure to use colorful fabrics and fun projects to keep the child engaged and interested.
3. Demonstrate and explain: Demonstrate how to use the sewing machine and explain each step in detail. Show the child how to thread a needle, how to tie off a knot, and how to make a straight stitch.
4. Be patient: Teaching a 5-year-old to sew can be a challenge. Be prepared to go over the same steps multiple times and remain patient.
5. Allow them to lead: After the basics are explained, let the child take the lead and guide them through each project. Encourage them to be creative and experiment.
6. Safety first: Make sure to stress the importance of safety when using a sewing machine. Explain the basics of how to use the machine and teach them how to properly wind a bobbin and thread the machine.
7. Provide supervision: Sewing can be dangerous, so it is important to provide close supervision when teaching a 5-year-old how to sew. Make sure to keep scissors, needles, and other sharp objects out of reach.
Teaching Kids How to Sew by Hand: Step-by-Step Guide
This guide is designed to help parents teach their children the basics of hand sewing. It provides step-by-step instructions on how to thread a needle, create a knot, and sew a running stitch. It also covers topics such as selecting fabric and needles, assembling tools, and finishing projects. Additionally, it provides tips on how to keep children engaged and motivated during the learning process.
Fun Sewing Projects for 7 Year Olds to Enjoy!
1. Make a pillowcase: Pillowcases are a simple and fun sewing project for 7 year olds. Use a basic pillowcase pattern or an easy-to-follow tutorial to get started.
2. Create a stuffed animal: Have your child pick out a favorite stuffed animal pattern and help them select fabric to bring their creation to life.
3. Sew a drawstring bag: Drawstring bags are a great way to teach children basic sewing skills. Use colorful fabric and have your child customize the bag with fun appliques and patches.
4. Create fabric flowers: Fabric flowers are a fun way to get creative with fabric scraps. Use different shapes and sizes of fabric to create unique flowers.
5. Make a pillow pet: Pillow pets are a great way to use up fabric scraps. Have your child pick out a favorite animal and then sew it together.
6. Create a fabric bookmark: Fabric bookmarks are a great way to get creative with fabric scraps. Have your child pick out their favorite fabric and stitch it together.
7. Make an apron: Aprons are a great way to teach kids basic sewing skills. Use bright colors and fun patterns to make a unique apron.
This guide is an excellent resource for teaching children to sew and quilt. The step-by-step instructions are easy to follow and the helpful tips and tricks provide a great foundation for teaching kids the basics of quilting. The guide covers topics such as the types of fabrics, tools, and stitches needed for quilting and provides helpful visuals to assist with the learning process. Additionally, the guide offers numerous project ideas that are both fun and educational. All in all, this guide provides a great foundation for teaching children to sew and quilt. I highly recommend it!
1. Begin by teaching children the basics of quilting. Explain to them the importance of using accurate measurements and the different tools used in quilting.
2. Guide them through the process of piecing together the quilt top. Start with a simple quilt block, such as a 9-patch or a log cabin, and show them how to lay out the pieces, pin them and sew them together.
3. Demonstrate how to layer the quilt top, batting and backing fabric, and how to baste them together.
4. Explain how to quilt the layers together using a walking foot or free-motion quilting.
5. Show the children how to bind the edges and finish off the quilt.
6. Finally, teach them how to care for and store the finished quilt.