Quilting is an enjoyable and rewarding hobby that allows you to create beautiful works of art from fabric and thread. However, it is not without its challenges. If you’re new to quilting, you may find yourself making some common mistakes that can ruin your project. In this guide, we’ll go over some of the most common quilting mistakes so that you can avoid making them.
1. Using Uneven Seams
One of the most common mistakes made by quilters is using uneven seams. This can cause your quilt to be lumpy or have gaping holes. To ensure even seams, be sure to use a quarter-inch seam allowance and measure your fabric carefully before cutting. Additionally, you should use a walking foot or quilting foot attachment to help ensure even seams while sewing.
2. Choosing the Wrong Thread
Another common quilting mistake is using the wrong type of thread. You should always use thread that is designed specifically for quilting. This will help ensure that your quilt is strong and durable. Additionally, make sure that you use thread that is the same color as your fabric so that it does not show through the fabric.
3. Not Pre-washing Fabric
Some quilters make the mistake of not pre-washing their fabric before cutting and sewing. This is important because pre-washing can help to prevent your fabric from shrinking after the quilt is completed. Additionally, it can help to prevent your colors from fading.
4. Not Using the Right Needles
The type of needle you use for quilting can make a huge difference. You should always use a sharp needle that is designed specifically for quilting. This will help to ensure that your stitches are even and that the needle does not catch or tear the fabric.
5. Not Making a Quilt Sandwich
A quilt sandwich is an essential part of quilting and should not be overlooked. This involves layering your backing fabric, batting, and top fabric in the correct order and basting them together. If you skip this step, your quilt will not be as durable or look as good as it should.
Conclusion
Quilting takes time and patience, but it can be a very rewarding hobby. However, it is important to avoid making common mistakes that can ruin your project. By following the tips outlined in this guide, you can ensure that your quilt turns out just the way you imagined it.
Mistakes while quilting can be common, especially for those new to quilting. Common mistakes include incorrect measuring and cutting, incorrect piecing, incorrect fabric selection, incorrect pressing, incorrect basting, incorrect quilting, incorrect binding, and incorrect finishing. Each of these mistakes can lead to problems with the quilt, including uneven seams, puckers, misaligned blocks, and unintentional holes in the quilt. To avoid mistakes while quilting, it is important to carefully plan out the quilt, choose appropriate fabrics, and take accurate measurements and markings on the fabric. Additionally, it is important to take care when piecing, pressing, basting, quilting, binding, and finishing the quilt. Taking the time to check for mistakes throughout the process can help ensure a successful quilt.
Fix Uneven Quilt Rows: Step-by-Step Guide
1. Gather Supplies: You will need a quilting hoop, quilting needles, quilting thread, and fabric scissors.
2. Prepare the Quilt: Make sure that your quilt is free of any wrinkles or folds that could cause your rows to be uneven.
3. Insert the Quilt into the Hoop: Place the quilt in the center of the hoop and tighten the screws until the quilt is secure.
4. Re-position the Rows: Using your fingers, gently re-position the quilt rows so that they are even with each other.
5. Secure the Rows: Using the quilting needles and thread, stitch along the edges of the rows to secure them in place.
6. Trim the Excess Fabric: Using the fabric scissors, trim any excess fabric that is sticking out from the edges of the rows.
7. Check your Work: Make sure that all the rows are even and that there are no gaps or wrinkles.
8. Remove the Quilt from the Hoop: Carefully remove the quilt from the hoop and admire your work!
Solving Common Quilting Issues: Understanding What Causes Puckering
Puckering is a common quilting issue that can be caused by a variety of different factors. It is important to identify and address the underlying cause of puckering in order to ensure that the finished quilt looks its best.
One of the most common causes of puckering is incorrect tension in the quilting process. If the tension is too loose, the fabric may gather and pucker when the quilting is finished. To prevent puckering, it is important to ensure that the tension on the sewing machine is adjusted correctly.
Another common cause of puckering is unevenly cut fabric. If the fabric pieces used in the quilt are not cut to the same size and shape, the edges may not match up correctly and cause the fabric to pucker when it is stitched together. It is important to use a rotary cutter and mat to ensure that all the fabric pieces are cut to the same size and shape.
Finally, puckering can also be caused by using the wrong type of batting. If the batting is too thick, it can cause the fabric pieces to bunch up and pucker when the quilt is assembled. It is important to use the right type of batting for the finished quilt size.
In summary, puckering is a common quilting issue that can be caused by incorrect tension, unevenly cut fabric, or using the wrong type of batting. It is important to identify and address the underlying cause in order to ensure that the finished quilt looks its best.
Troubleshooting Tips for Aligning Quilt Squares Perfectly
1. Start with a flat surface. Make sure that you have a flat surface to work on. This will help ensure that your quilt squares are aligned perfectly.
2. Use pins or clips. Use pins or clips to help hold the fabric in place while you’re working. This will help keep the fabric from shifting during the alignment process.
3. Trace the lines. Use a ruler and a pencil to trace the lines that will be used for the alignment of the quilt squares. This will help you to ensure that the lines are straight and that all of the squares are lined up correctly.
4. Use a seam ripper. A seam ripper is a great tool for making sure that all of the seams are lined up perfectly. It can help you remove any excess fabric that may be causing the squares to be misaligned.
5. Check for accuracy. After you’ve finished aligning the quilt squares, check for accuracy with a ruler. This will help to ensure that the squares are perfectly aligned.
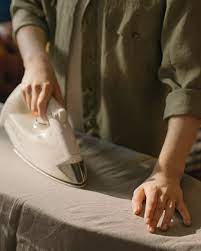
6. Iron the fabric. Once the alignment is complete, press the fabric with an iron. This will help to ensure that the fabric is smooth and that the alignment is secure.
Overall, this guide for avoiding mistakes while quilting is an excellent resource for quilters of all skill levels. It covers a wide range of common mistakes, from cutting fabric incorrectly to pressing seams incorrectly, and provides tips to help you avoid them. Additionally, it provides helpful advice on tools and techniques for successful quilting. By following these guidelines, quilters can ensure they make the most of their time and materials while creating beautiful quilts. My recommendation is to read through this guide thoroughly, and to practice and review these techniques regularly to make sure you feel comfortable and confident in your quilting skills.
1. Not measuring seams properly: Properly measuring and pressing seams is essential for making sure that the quilt top lies flat and the pattern looks the way it was intended.
2. Not using a walking foot: A walking foot is a quilting tool that helps keep the layers of fabric and batting together while sewing. Without it, the layers can shift and cause puckering or misalignment.
3. Not basting the quilt layers: Basting the quilt layers together is an essential step in making sure that the quilt lies flat and the quilting lines are even.
4. Not using the right needle size: Using the wrong size needle can lead to skipped stitches, broken needles, and uneven quilting lines.
5. Not testing the stitch length: Test the stitch length on a scrap piece of fabric to make sure the quilt stitches are consistent and even.


