Quilting is an art form that has been around for centuries. It involves piecing together fabric scraps and creating a decorative piece of artwork. Quilting is a great way to express your creativity and add a unique touch to any room. Whether you are a beginner or an experienced quilter, this guide will help you get started on your own quilting project.
Step 1: Choose Your Fabric
The first step to starting a quilting project is to choose the right fabric. You will need to decide what type of fabric you would like to use for your quilt. Cotton is the most popular choice for quilting due to its durability, but you can also use other fabrics such as flannel, silk, or muslin. When choosing a fabric, consider the colors and patterns you would like to use.
Step 2: Measure and Cut the Fabric
Once you have chosen your fabric, the next step is to measure and cut it. You will need to measure the dimensions of your quilt and then cut the fabric accordingly. It is important to ensure that the fabric is cut accurately so that your quilt will be even and symmetrical.
Step 3: Assemble the Pieces
Once the fabric is cut, you can begin assembling the pieces. Start by laying out the fabric pieces on a flat surface and arranging them so that they fit together correctly. When sewing the pieces together, be sure to use a straight stitch.
Step 4: Quilt the Pieces
Now that the pieces are assembled, you can begin quilting them. You will need to choose a quilting pattern and then use a quilting machine to stitch the pattern onto the fabric. This is usually done with a quilting foot attachment on the machine.
Step 5: Finish the Quilt
The final step is to finish the quilt. This includes adding any decorative touches such as buttons or ribbons. You can also add a border to the quilt for extra detail. Once you have completed these steps, your quilt is ready to be displayed and enjoyed.
Conclusion
Quilting is a great way to express your creativity and create a unique piece of artwork. By following the steps outlined in this guide, you can easily get started on your own quilting project. With the right fabric, measurements, and quilting techniques, you will be able to create a beautiful quilt that you can be proud of.
techniques
1. Gather the necessary supplies such as fabric, quilting needles, thread, quilting ruler, and cutting mat.
2. Decide on a pattern and lay out the fabric pieces to create the quilt top.
3. Sew the pieces together using a quarter-inch seam allowance.
4. Layer the quilt top, batting, and backing together and baste the layers together with safety pins or a basting gun.
5. Quilt the layers together using a quilting pattern of your choice.
6. Trim the edges and bind the quilt with fabric or bias tape.
7. Hand or machine stitch the binding to the quilt for a finished edge.
How to Start Quilting: A Guide for Beginners
Quilting is a fun and rewarding craft that can be enjoyed by people of all ages and skill levels. Whether you’re a beginner or an experienced quilter, there are many things to consider when starting a new quilting project.
1. Gather Your Supplies
Before you start quilting, you’ll need to gather the right supplies. The most important supplies include fabric, batting, thread, a rotary cutter and self-healing mat, scissors, and a sewing machine. You’ll also need pins, a tape measure, and iron and ironing board.
2. Choose a Pattern
Once you have your supplies, it’s time to choose a pattern. There are many quilting patterns available online, in quilting books, and at your local quilt shop. Consider the size of your quilt, the skill level required, and the materials needed before you begin.
3. Cut Your Fabric
Once you’ve chosen your pattern, you’ll need to cut the fabric pieces. Use a rotary cutter and self-healing mat to make precise cuts. If you’re using a pattern with multiple pieces, mark the pieces with a fabric marker so they don’t get confused.
4. Assemble the Quilt
Once you’ve cut the pieces, you’re ready to start assembling the quilt. Start by laying out the pieces and arranging them according to the pattern. Then, use pins to hold the pieces together and sew them together with a sewing machine.
5. Layer and Quilt
Once you’ve assembled the quilt top, it’s time to layer and quilt. Lay out the quilt top, batting, and backing and pin them together. Then, use a longarm quilting machine or a walking foot sewing machine to quilt the layers together.
6. Finishing the Quilt
Once the quilt has been quilted, it’s time to finish it. Trim the excess batting and backing and use a zigzag stitch or a binding foot to add a binding to the edges of the quilt. Finally, use a steam iron to press the quilt.
These are the basic steps for how to start quilting. With practice and patience, you’ll be able to create beautiful quilts in no time.
The Easiest Quilt Pattern for Beginners: Get Started Quilting Today!
The Easiest Quilt Pattern for Beginners: Get Started Quilting Today! is a great way for a beginner to get started quilting. This pattern is designed to be easy to follow and requires only minimal sewing skills. The pattern uses simple shapes and requires no special tools or materials. It can be made with a small amount of fabric, so it’s an ideal pattern for those just starting out.
The pattern includes instructions for cutting the fabric, piecing the quilt top, basting the quilt, and quilting the quilt. It also includes a diagram and detailed instructions for binding the quilt. Once complete, the quilt will measure approximately 48 inches by 48 inches.
This pattern is suitable for a variety of skill levels, from beginners to more experienced quilters. It is a great way to get started with quilting and can be adapted to fit any skill level. With a few basic supplies and some basic sewing skills, anyone can make this quilt.
How to Start Quilting: A Beginner’s Guide to Quilting Basics
Quilting is a craft that has been enjoyed for centuries. It is a fun and creative way to make beautiful pieces of artwork from fabric pieces. Here is a beginner’s guide to help you get started on your quilting journey:
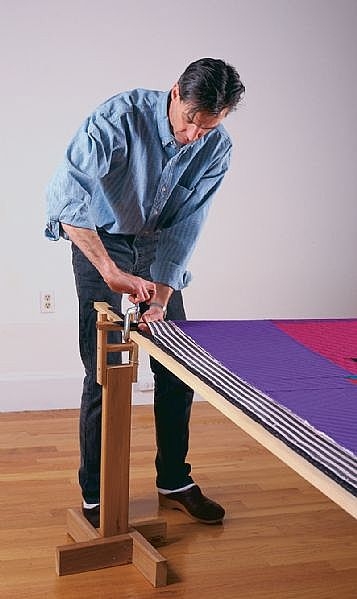
1. Gather the Materials: Before you start quilting, you need to make sure you have all the materials you need. This includes fabric pieces, batting, thread, a quilting needle, and a quilting hoop or frame.
2. Choose a Pattern: Once you have all the materials, you can choose a quilting pattern. There are many different patterns to choose from, depending on the look you are going for. If you are a beginner, it is best to start with a basic pattern like a Nine Patch or Log Cabin.
3. Cut the Fabric: The next step is to cut the fabric pieces according to the pattern you have chosen. It is important to make sure the pieces are all the same size and shape, so that the quilt will look even when it is finished.
4. Piece the Quilt Top: After you have all the pieces cut, you can start piecing the quilt top. This involves sewing the pieces together to form the quilt top.
5. Add the Batting and Backing: Once the quilt top is complete, you can add the batting and backing. The batting is a layer of material that adds warmth and softness to the quilt. The backing is the fabric that will be seen on the back of the quilt.
6. Quilt the Layers: The last step is to quilt the layers together. This is done by stitching the layers together with a quilting needle. This helps keep the layers together and adds a decorative touch to the quilt.
7. Finish the Edges: Once the quilting is finished, you can finish the edges of the quilt with a binding. This helps give the quilt a finished look and keeps the layers together.
Quilting is a great hobby to learn and can be very rewarding once you complete your first quilt. With the right materials, pattern, and technique, you can create a beautiful quilt that will be cherished for years to come.
for beginners
5 Easy Quilting Patterns for Beginners | Step-by-Step Instructions
This article provides step-by-step instructions for five easy quilting patterns for beginners. The patterns include Log Cabin, Nine-Patch, Rail Fence, Four-Patch, and Flying Geese. For each pattern, the article provides a description of materials and tools required, a diagram of the pattern, and a step-by-step guide for cutting and piecing the quilt blocks. It also offers tips for keeping your quilt top square, making sure the seams match up, and finishing the quilt.
Beginner Quilting Patterns: 10 Easy Steps to Get You Started
Beginner quilting patterns can be a great way to learn the basics of quilting, as well as create a one-of-a-kind quilt. Whether you’re a complete beginner or an experienced quilter looking for a refresher, here are 10 easy steps to get you started.
1. Choose Your Quilt Pattern: Choose a quilt pattern that’s simple and easy to follow. There are a variety of patterns available online or in quilting books.
2. Select Your Fabric: Choose coordinating fabrics that complement your quilt pattern. Consider choosing fabrics in a variety of colors, textures and patterns.
3. Calculate the Yardage: Measure your quilt pattern to determine how much fabric you’ll need.
4. Cut the Fabric: Cut the fabric into strips, squares and other shapes according to the quilt pattern.
5. Assemble the Quilt Blocks: Start assembling the quilt blocks according to the instructions. This can be done by hand or using a sewing machine.
6. Layer the Quilt Pieces: Place the quilt pieces in the correct order, alternating between the batting and the backing fabric.
7. Quilt the Quilt: Use a quilting needle and thread to hand-stitch the quilt pieces together.
8. Add Borders: Select a coordinating fabric for the borders of the quilt.
9. Bind the Quilt: Sew the binding fabric to the quilt edges using a sewing machine or by hand.
10. Enjoy Your Quilt: Wash, dry and admire your completed quilt!
Buy a Quilt Making Kit: Everything You Need for Creative Quilting
A quilt making kit contains all the materials necessary to create a quilt from start to finish. Generally, kits come with instructions, fabric, batting, backing, and quilt binding. Some kits also include specialized tools, such as a rotary cutter, quilting ruler, and quilting foot. The amount of fabric and supplies included in a kit will vary depending on the size and complexity of the quilt.
When purchasing a quilt making kit, it is important to consider the skill level of the quilter and the type of quilt they are making. Beginner quilters may want to start with a kit designed for beginners, while advanced quilters can find more complex kits with more intricate designs. It is also important to consider the desired size of the finished quilt, as some kits may only produce a quilt of a certain size. Additionally, the fabric included in a kit should be chosen to match the desired aesthetic of the finished quilt.
techniques
Overall, this guide provides a great introduction to quilting techniques and provides step-by-step instructions for starting a quilting project. It is also helpful in learning the basics of quilting and understanding the basics of fabric selection, quilting tools, and quilting techniques. It is a great resource for those new to quilting and will help them get started in the craft. However, it is important to note that quilting is a complex craft with many nuances and quilters should continue to practice and explore different techniques to become more proficient. As such, it is recommended that quilters continue to seek out additional resources and practice as much as possible.
supplies
1. Gather your quilting supplies: a quilting pattern, fabric, batting, rotary cutter, quilting ruler, and pins.
2. Choose your fabric and batting carefully to determine the overall size and thickness of your quilt.
3. Cut your fabric and batting into the desired pieces and shapes based on your quilting pattern.
4. Use a rotary cutter and quilting ruler to ensure accurate and clean cuts.
5. Lay out your pieces and arrange them in the desired pattern.
6. Pin the pieces of fabric together to keep them in place.
7. Start sewing the pieces together, beginning with the center and working out.
8. Continue sewing until the quilt top is complete.
9. Layer the batting, quilt top, and backing fabric and pin together.
10. Quilt the layers together in the desired pattern.
11. Trim away excess fabric and batting.
12. Sew a binding around the quilt to finish.